Preparing your home for an electrical inspection ensures the process goes smoothly and increases the likelihood of passing on the first attempt. Here are some steps to help you get your home ready:
1. Check All Outlets and Switches
- Test each outlet and switch to confirm they work correctly.
- Replace any damaged or non-functional outlets and cover plates.
- Ensure GFCI (Ground Fault Circuit Interrupter) outlets are installed in kitchens, bathrooms, and other areas near water, as required by code.
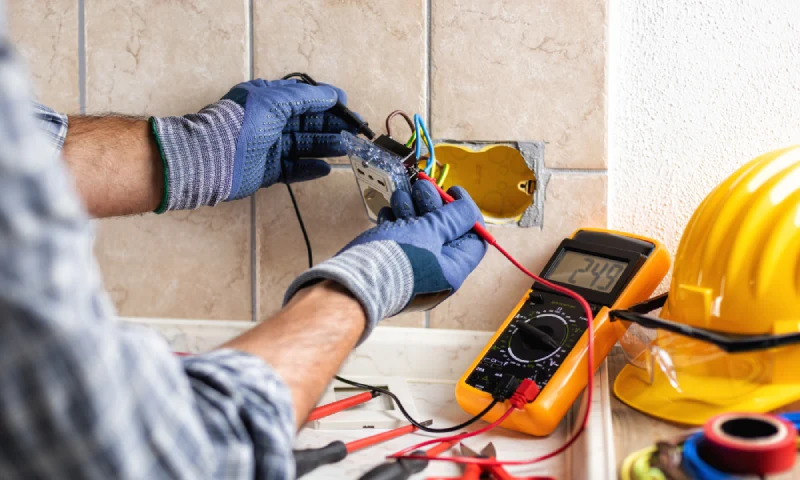
To prepare for an electrical inspection, start by thoroughly checking all outlets and switches throughout your home. Test each one to confirm they’re functioning correctly, as any damaged or non-functional outlets and cover plates should be replaced. This ensures safety and compliance with electrical standards. Additionally, ensure that GFCI (Ground Fault Circuit Interrupter) outlets are properly installed in kitchens, bathrooms, and any other areas near water sources, as these are required by code for enhanced safety.
2. Label Your Electrical Panel
- Clearly label each circuit breaker to indicate the corresponding rooms or appliances.
- Make sure the panel is not blocked and is easy for the inspector to access.
Labeling your electrical panel is another important step in preparing for an inspection. Each circuit breaker should be clearly labeled to indicate the corresponding rooms or appliances it controls, making it easier for the inspector to understand your home’s electrical layout. Additionally, ensure that the panel is unobstructed and easy to access, so the inspector can evaluate it without any delays or difficulties.
3. Inspect Light Fixtures
- Ensure all light fixtures are working, securely mounted, and have the correct wattage bulbs.
- Check that outdoor lighting is weatherproof and has protective covers.
Inspecting your light fixtures is essential before an electrical inspection. Make sure all fixtures are working properly, securely mounted, and equipped with bulbs of the correct wattage. For outdoor lighting, confirm that fixtures are weatherproof and have protective covers to safeguard them from the elements, which enhances both safety and durability.
4. Address Any Exposed Wiring
- Inspect for exposed wires or open electrical boxes, which can be a safety hazard.
- Cover any exposed wiring with proper junction boxes and ensure wires are properly secured.
Address any exposed wiring throughout your home, as it can pose a significant safety hazard. Look for any visible wires or open electrical boxes, and cover exposed wiring with appropriate junction boxes. Ensure that all wires are properly secured to prevent any risks during the inspection and to meet safety standards.
5. Test Smoke and Carbon Monoxide Detectors
- Make sure all smoke detectors and carbon monoxide alarms are installed in the required locations (such as in hallways, near bedrooms, and on each level).
- Test each alarm to ensure it’s operational, and replace batteries if necessary.
Test all smoke detectors and carbon monoxide alarms to confirm they are installed in the required locations, such as in hallways, near bedrooms, and on each level of your home. Verify that each alarm is fully operational, and replace batteries if needed to ensure they are functioning properly for the inspection.
6. Organize Electrical Appliances
- Unplug any non-essential appliances and clear areas around large appliances to give the inspector better access.
- Ensure all hard-wired appliances (like dishwashers and ovens) are correctly installed and connected.
Organize your electrical appliances by unplugging any non-essential items and clearing space around larger appliances to provide the inspector with better access. Make sure all hard-wired appliances, such as dishwashers and ovens, are properly installed and securely connected to ensure a smooth inspection process.
7. Check for Grounding and Bonding
- Ensure that your main electrical panel and outlets are properly grounded and bonded to prevent electrical shock.
- This is especially important in older homes where grounding might not meet modern standards.
Check that your main electrical panel and all outlets are properly grounded and bonded to prevent the risk of electrical shock. This step is particularly crucial in older homes, where grounding may not meet current standards. Ensuring proper grounding and bonding is essential for both safety and compliance with modern electrical codes.
8. Remove Obstructions
- Clear any furniture or items blocking access to outlets, switches, or the main electrical panel.
- Make sure attics, basements, and crawl spaces are accessible if they contain electrical components.
9. Review Permit Requirements
- If you recently had electrical work done, ensure all required permits are completed and available for the inspector to review.
Review any permit requirements if you’ve recently had electrical work completed. Make sure all necessary permits are properly documented and readily available for the inspector to review, ensuring compliance and avoiding any potential delays during the inspection.
Consult a Licensed Electrician
Consider consulting a licensed electrician to help identify and correct any potential issues before the inspection. A professional can offer insights and make necessary adjustments, especially if you’re unsure about any aspect of your home’s electrical system. Scheduling a pre-inspection with an electrician can be highly beneficial, increasing the likelihood of a successful inspection.
Ready to ensure your home’s electrical system meets all safety and compliance standards? Contact us today to schedule an expert pre-inspection!


